As you have probably already gathered, I am a big fan of self publishing and in this section of the website I will provide you with some cool self publishing tips that will enable you to get started.
Most authors, and quite understandably so, will write their book and immediately start looking for a publishing agent or a publisher to publish their book. Whilst there is nothing wrong with this, consider the following:
- The vast majority of authors spend months, if not years, trying to find a publisher to owlish their book, by which time their content might be outdated.
- Publishing companies receive literally hundreds of manuscript submission each week. I believe most of them never get read!
- It is unlikely you will receive a reply from a publisher. Most of them do not respond to manuscript submissions.
- If you do manage to get interest from a publishing company, and they are interested in offering you a contract, you will most probably end up with between 10 and 15% of net royalties. The important word here is ‘net’. Net is basically what is left after all of the costs come out associated with the publishing and selling of your book, including the 55-60% chunk Amazon takes! That means, if you are lucky, you will receive approximately 50pence for every book that is sold. Doesn’t sound fair, does it? In fact, to prove my point, the Society of Authors recently wrote an open letter to all publishers expressing their concerns regarding the fact that authors annual incomes are decreasing rapidly. You can read the entire letter HERE.
Taking into consideration the above factors, surely you will agree that you owe it to yourself to at least try the self publishing route? If you are still with me, read on.
THE BENEFITS OF SELF PUBLISHING
The bottom line is this: if you choose to self publish, and you follow the self publishing tips I have provided you with on this website, you can literally earn five times the amount you would probably dean if you went with a traditional publisher. There are numerous benefits of using the self publishing route and I will briefly outline of each them now:
- You will keep control of literally every element of the book publishing process. This includes, creation and editing of the content; the book cover design (we already know how important this part is!); typesetting; Amazon Kindle conversion and the marketing of your book.
- You will get to keep 100% of the royalties after costs. Whenever I site down to plan my book, I will always have an aim of making a minimum of 5GBP from every sale. That’s ten times the amount per book sold than I would receive if I chose to use a publishing company to publish my book. The great thing about this, is that you can then use the additional finances you receive from book royalties to either market and promote your book further, or write and publish another one.
- Not only will you receive a higher royalty rate, but you will also get paid a heck of a lot faster. The majority of authors who use a publishing company, only get paid once of twice per annum. And when they DO eventually get paid, most of them are disappointed with the amount.
Of course, for some, the fact that you have to do all of the work as a self publishing author, is too much. One of the small benefits to finding a book publisher is that you don’t have to do anything once the book is written. However, trust me when I say you will most probably enjoy the challenge of taking your book to market, once the manuscript is written.
So, now that we have explored the benefits of the self publishing route, let’s take a look at each stage of the process in greater detail.
STEP 1 – Create your book idea
First of all, decide your genre for your book. It does not matter whether you choose fiction, non-fiction, children’s or poetry, it is important that you decide on your genre. This will the basis for creating a solid book which has the best chance possible of becoming a nest-seller.
To help you choose, you can see a full list of book genres on the Guardian website, HERE.
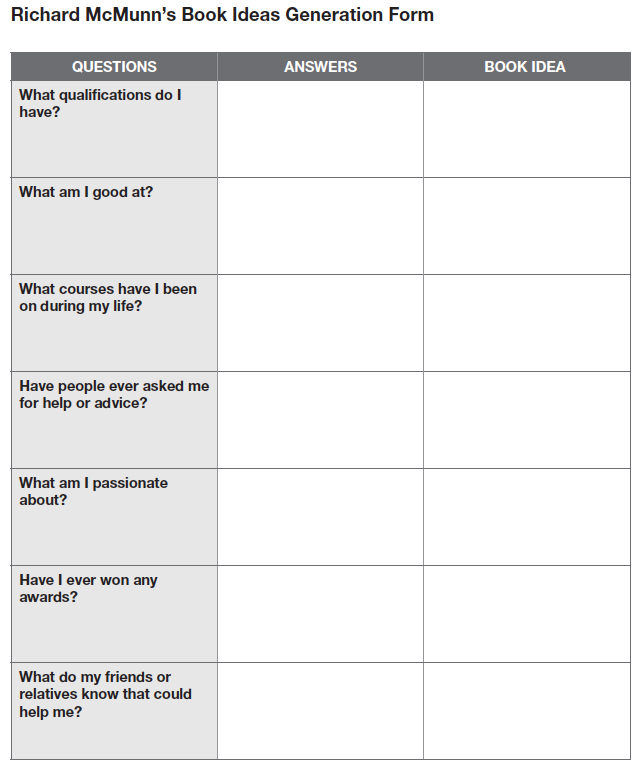
You may find it useful to use my BOOK IDEAS GENERATION FORM, which is detailed below.
Copyright © Richard McMunn 2016. All rights reserved.
Once you have come up with your book idea, write it down before moving onto step 2.
STEP 2 – Research to see whether or not the book will sell
During step 2 of the action plan you should use the Google Keyword Planner Tool to ascertain whether or not the book will sell. Type in the anticipated title of your book into the relevant field on the Planner Tool page using the lessons learnt during the previous chapter. If you believe the book will sell and that there is demand for it, move on to step 3. If there are no people looking for your book, consider going back to step 1.
STEP 3 – Write the content for your book
During step 3 you need to start writing the content for the book. As a general guide start writing your manuscript in Microsoft Word, font Arial size 12, with a paragraph spacing of 1.5. Set yourself a target of at least 3 pages every day. If you stick to this you will have written almost 100 pages within a month. Whilst you are writing your book move on to step 4.
STEP 4 – Order the front cover book design artwork
Whilst still writing your book, order the artwork for the front cover. This is a great self publishing tip that will keep you ahead of the game!
I recommend reading the section relating to ‘BOOK COVER DESIGN’ on this website, which is located under the SELF PUBLISHING tab to learn how to find great book cover designers.
STEP 5 – Proofreading and editing
Once you have finished writing the manuscript and you are 100% happy with the content, send it off to be proofread/edited. Once again, I recommend you refer to the ‘PROOFREADING AND EDITING’ section of the website to learn how to source professionals in this area.
STEP 6 – Typesetting and formatting for Kindle
Once the proofread/edited manuscript is returned to you and you have checked it over to see that you are happy with any changes made, it is now time to get the manuscript typeset for print and formatted for Kindle.
Typesetting is basically preparing the book for print. I recommend that you outsource this element of the book publishing process as it is important to get it right. I usually send the book cover design to the typesetter along with the manuscript so that he or she has an idea of how to brand and style the typesetting to maintain brand consistency.
With regards Kindle formatting, I recommend you refer to the section on the website where I cover this in greater detail.
STEP 7 – Open your Amazon account to get your book on pre-order
During step 7 of the action plan you will need to apply for your Amazon account.
Before you open your Amazon account you will need to obtain your ISBN number from Nielsen, as you will need to allocate an ISBN to your book before Amazon will accept it (Advantage account holders only).
If you are planning on opening an Amazon CreateSpace account then you will not need an ISBN, as Amazon will supply it for you. Your book can now go on pre-order sale by following the simple steps in your account.
STEP 8 – Open your Amazon Kindle Digital Text Platform (DTP) account and upload your book
During step 8 you need to get your formatted guide uploaded to Kindle. My advice is to get the PDF manuscript (typeset version) formatted to ePUB format. This is a great format to use on Kindle, simple because you can also use this format if you decide to submit your book to the Apple IBookStore. Killing two birds with one stone has never been more prevelant!
STEP 9 – Order your book cover jacket for print
During step 9 you are advised to order the full book cover jacket, which will be required for print. Although you already have the front cover, you will need the jacket, including spine and rear cover, for print purposes. Don’t forget to also add the bar code and ISBN to the bottom right hand corner of the rear cover.
STEP 10 – Order your physical books from your chosen printer
Once you receive the typeset guide back from the designer you must check it over thoroughly to make sure there are no mistakes. Do not automatically assume the typesetter will not make any mistakes – they can and do creep in at times. Once you are happy with the typeset document and you have the full book cover jacket, you can now go to print.
Whenever I order a new physical book from my printers I will always order a small run of approximately 100-200.
STEP 11 – Launch your physical book on Amazon and send a sample to Gardners books
As soon as you receive the printed books from the printers you can now launch your book on Amazon. You should also consider sending off a sample book to Gardners at this stage to see if they would be willing to stock it.
The above action plan has always worked for me, and I am sure it will work for you too. It does not matter what genre of book you are writing, give the action plan a try and see how far you get with your book writing and publishing aspirations.